
Digital Comics, Part 2: Vector Graphics

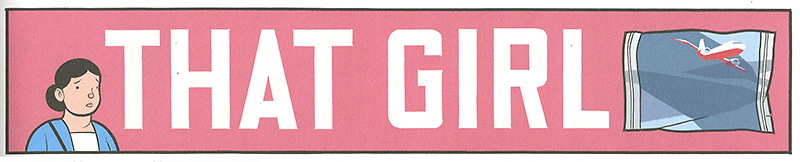
Detail frame from Chris Ware’s “Building Stories” (Pantheon Graphic Novels, 2012)
For the second part of our digital comics project, we will create an illustrated title frame or heading for our short story sequence using vector graphics in Adobe Illustrator.* Your work should present the title and author of your short story in a visual way, with careful consideration of the shapes, writing/fonts, and colors used. Strive to create a cohesive graphic that is well-suited to the mood of your story and that reinforces some of the imagery in your photo sequence. Plan to position your graphic either above your photo sequence as a heading or as an intro frame at the beginning of your sequence. We will look at examples of title frames and headings in class and in a visit to the WSU Art Museum.
Part 2 of the Digital Comics project is also an opportunity to improve on the sequencing, juxtaposition, and digital photo editing you completed in Part 1. You are free to replace images, improve on image adjustments, and change frame formatting.
* If you are an intermediate or advanced student in Illustrator, you may wish to create an entire comic book-inspired cover, or to completely re-make your sequence using vector graphics.
Another detail frame from Chris Ware’s “Building Stories” (Pantheon Graphic Novels, 2012)
What Are Vector Graphics?
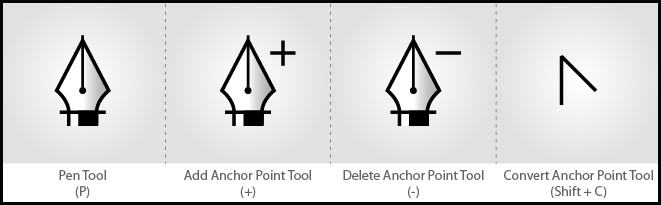
Make sure you are familiar with all the options nested under the Pen Tool. It will be helpful to learn the key commands to switch between these options. Key commands are shown in parentheses.
Vector graphics are composed of paths, or lines, that are either straight or curved. The data file for a vector image contains the points where the paths start and end, how much the paths curve, and the colors that either border or fill the paths. Because vector graphics are not made of pixels, the images can be scaled to be very large without losing quality. Raster graphics, on the other hand, such as the ones you made in Photoshop, can become blocky when enlarged, since each pixel increases in size as the image is made larger. This is why designs such as logos are typically created in vector format—the quality will look the same on a business card as it will on a billboard. Vector graphics are usually saved as with the extension AI (Illustrator file) or EPS.
Adobe Illustrator is a vector graphics program, which has different strengths and uses than Adobe Photoshop. Understanding paths, and how to manipulate them with the pen tool—adding, moving, and altering points along the path—is the key to getting the most out of Illustrator. The pen tool has a steep learning curve but it is worth spending time on.
Note that you are still somewhat concerned with resolution for this project, in that the raster-based PSD files you place in Illustrator are still made of pixels, even though the new graphics you create will be made of points and the lines that connect them.
Requirements
- As part of your title/heading graphic (title and author of short story must be featured), draw some custom shapes and/or letters using the pen tool and its accompanying tools. You will start to get a feel for this after you have completed the tutorial requirements for this project. Speech bubbles and action lines could even be added to your photo sequence if this makes sense visually.
- Familiarity with how fill and stroke are used to assign color. Choose colors carefully to suit the mood of your story. Save the colors you use as swatches so you can find them again easily. Check out the Color panel, the Swatches Panel, the Stroke panel, and the Eyedropper tool.
- In addition to drawing some custom shapes/or letters, experiment with using the type tool as well. Choose a font carefully: Just like color choices, fonts should be well-suited to the mood of your story and the images in your sequence.
- Pay attention to your layers panel and make and name new layers to keep your paths, shapes, etc. organized. Illustrator does not automatically make new shapes like Photoshop does.
- Make sure you understand clipping masks and placing linked artwork as it relates to recreating your photo sequence to go along with your title frame/heading. (Moving, aligning and distributing objects will also be helpful.)
- Select all type (Select > Object > All Text Objects) and then convert it to outlines (Type > Create Outlines) before handing in your Illustrator file. This way fonts will not be missing when I go to grade your work.
Required Tutorials
Download and complete this tutorial, saved as “yourlastname-yourfirstname-pentool.ai”:
Then, follow along with these two video tutorials and practice drawing one or more objects that you brainstormed during/after class. Save your practice drawings on a new artboard in your tutorial file. (For example, if you are working on the story “Saturday Biscuits” you might attempt to draw the silhouette of a t-shirt, a house, a flight of stairs, children, etc., for use in your heading graphic.)
- Illustrator Pen Tool Tutorial, Part 1, https://www.youtube.com/watch?v=kXxmKZtFutI
- Illustrator Pen Tool Tutorial, Part 2, https://www.youtube.com/watch?v=bSi1OgvuCPk
Adobe Help and the Illustrator tutorial page on your class website are good places to start to find more help!
Workflow
- Complete tutorials as assigned.
- Place your PSD files in your AI file and reconstruct your sequence, making clipping masks to crop your photos. Is there anything you want to change photo-wise or frame-wise in this version of the sequence?
- Based on what you learned in your AI tutorials, draw your title/heading frame using only vector graphics. Keep the paths and shapes you create well-organized in the layer panel.
- Also consider adding text and shapes to your photo sequence as appropriate. New vector objects can be clipped along with each photo if you wish.
What You Will Turn In
Printed:
- Digital comic printed from Illustrator file at high quality on an 11×17 sheet of paper. (Make sure to print the night before. Go to CougarCopies in the CUB if the AML printers are down.)
- Written reflection sheet (download and print).
Digital Files (make sure you can hand in your thumbdrive):
In a folder called “yourlastname-yourfirstname-02”:
- Your final Illustrator file as “yourlastname-yourfirstname-02.ai” (Remember to convert all type to outlines!)
- Your photoshop files that you placed inside the above file. (These may be named as you wish.)
- Your tutorial file called “yourlastname-yourfirstname-pentool.ai
- Your citation sheet from last time, updated as needed
Your files/folders must be named, organized, and saved exactly as specified here. You will lose a point for each time you fail to follow these instructions. Capitalization and spaces count when naming files (No caps! No spaces!)
This is the rubric that will be used to grade Digital Comics, Part 2.
