
Artisanal Currency and Buy Local Palouse Campaign
- Part 1: Getting to Know Your Business Through Photo Elicitation Interviews
- Part 2: Icons, Patterns, and Color
- Part 3: Currency Designs
- Part 4: Final Presentations
Readings:
- Do You Have Change for a Bowie? The Advent of Artisanal Cash
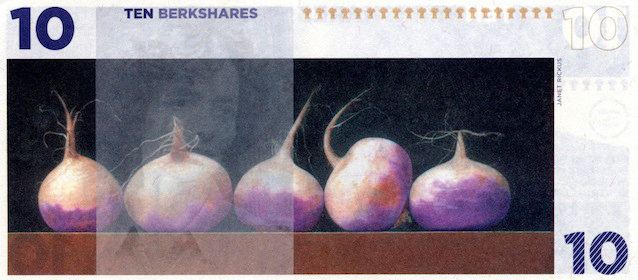
- What’s Minted in Berkshire County Stays There: Finding Reward in Local Currency.
- Intro and second PDF excerpt from “Working Knowledge: Skill and Community in a Small Shop”
- Semiology reading from Timothy Samara’s “Design Elements: A Graphic Style Manual”
- “Graphic Design: The New Basics” by Jennifer Cole Phillips and Ellen Lupton
- Alec Thibodeau’s Noney project
Is paper money still relevant to our economy? Read Do You Have Change for a Bowie? to find out.
Overview
The technological environment in which we reside suggests that printed materials like paper money, bound books, and hand-written letters may soon fall completely by the wayside, to be replaced by online banking, tablet reading, and text-messaging. A more optimistic view may be that formerly practical printed material can now be reserved for specialized uses, motivating specific actions which may benefit our culture and society to counteract some of the drawbacks of digitization. Can the advent of digital culture enable us to reinvent a new roles for print culture? As graphic designers and students of digital culture and media, we will ask this question in the context of printed money, beginning by considering this reading: Do You Have Change for a Bowie? The Advent of Artisanal Cash and watching What’s Minted in Berkshire County Stays There: Finding Reward in Local Currency.
Let’s imagine that Pullman-Moscow has decided to institute a regional currency, for use only in the exchange of products and services in the Palouse region, in the spirit of the local currency issued by Berkshire County in Massachusetts. Our class will break into five groups and each group will be assigned a local business to study. Each group will be charged with the design of a double-sided artisanal bill (bill denominations will be assigned: $1, $5, $10, $20, $50). The design should visually celebrate and explain what the business provides to the community. The bills should be considered both collectible items as well as practical units of currency that will promote local spending. In addition, each group will be charged with designing a web-appropriate diagram or visualization that can creatively chart the overall dollars spent in the (imagined) Buy Local Palouse campaign, as well as the popularity of the program at each participating business.
Note: This project requires students to create new and unique designs. Identity designs, such as logos, and advertising materials for the participating business will not be part of the project.
To prepare for this project, we will read, study, and discuss excerpts from Douglas Harper’s sociology book “Working Knowledge: Skill and Community in a Small Shop” (Berkely, CA: University of CA Press, 1987. Pgs 1-15, 24-73.). You should draw inspiration from Harper’s intensive study of Willie and his repair shop. Plan to make multiple visits to your business over the course of the semester and get to know what happens there through a process of photo elicitation interviews. For more on photo elicitation, see Harper reading pg 12 (pg 8 if going by PDF pages).
– – – – –
Part 2: Icons, Patterns, and Color
(100 pts for individual design submission, due 11/19/2019)
For Part 2, each individual member of your group will develop three to five icons, a color scheme, and at least one pattern based on the specific task or process documented in Part 1: Getting to Know Your Business Through Photo Elicitation. Your icons, pattern, and color scheme should be inspired by handwork (or other parts of the human body), mechanical work, tools/equipment, materials/ingredients, and/or specialized knowledge related to the documentation you collected at your business.
Each member of the group will do this work on his or her own and turn in files via the “Artisanal Currency Part 2: Icons, Patterns & Color” assignment page on Blackboard. On 11/19/2019 your group will review all graphics and decide on one set of icons, pattern(s) and colors to use for Part 3: Currency Designs. You may choose one group member’s work to use outright, or you may compile and refine a set using the work of more than one member, but your final set should include:
- 3-5 icons
- 1 pattern
- 1 color scheme of 4-6 colors
Icons
Develop three to five icons based on your group’s documentation of a specific task or process. Each icon should be highly mediated (see “Semiology” reading from Timothy Samara’s “Design Elements: A Graphic Style Manual”) and should feel like it belongs with the other icons you create. Like a good logo or a good typeface design, your icon needs to be visually successful and clear at both small and large scales.
What handwork (or other parts of human body), mechanical work, tools/equipment, materials/ingredients, and/or specialized knowledge was documented in Part 1 that will lend itself well to icon development? Remember, you can refer to a subject through association as well: This is called indexing, such as when an image of an egg is used to refer to a bird. Refer to your Timothy Samara “Semiology” reading as you think about what icons you want to create and how they will be rendered:
“In arranging the elements, even for that of a recognizable object, the designer’s goal is to invent a specific graphic language—an internal logic of positive and negative relationships, an emphasis on curved or angular forms, and an integration of line and mass—that will make the mark live as its own, unified image, rather than simply reproducing the likeness of the object. In one sense, the distilled, stylized mark is neutral because it seeks to communicate on an objective, universal level; simultaneously, however, it must have its own identity as a form” (Samara, 170).
Each icon should:
- Be created as a vector graphic in Illustrator
- Be black and white for now (you can add color later)
- Be a single, filled, closed shape (combine shapes / make compound paths if needed): Other designers should be able to change the fill color and resize your icon easily
- Avoid using strokes in most cases
In Illustrator:
- Embed reference image(s) you use from your group documentation
- Show each of your icons at both small and large scales (one icon per artboard)
- Name the file “yourlastname-currency-icons.ai” (Submit only one AI file)
Color and Pattern(s)
Develop a color scheme using 4 to 6 colors based on your group’s documentation of a specific task or process.
Likewise, using your color scheme, develop a visually interesting pattern based on your group’s documentation of a specific task or process. You might be inspired by movement, change, construction, deletion, etc., depending on what process or task was the focus of your group’s attention. (You may submit additional pattern designs if you create more than one.)
Your pattern(s):
- May be constructed of whatever shape(s) you wish. You do not have to use the shapes you design for your icons (see above).
- Must use the color scheme you created.
In Illustrator:
- Use the Pattern Options panel to design your pattern so you can save it and export it as a swatch
- Show your color scheme on one artboard
- On a second artboard, show how your pattern exists as an all-over pattern: Draw a rectangle to fill the artboard and fill it with the appropriate pattern swatch. Do this for each pattern or color variation you have tried. (You do not need to document the individual tile this time.)
- Name the file “yourlastname-currency-pattern.ai” (Submit only one AI file)
What You Will Upload to Blackboard:
Upload both “yourlastname-currency-pattern.ai” and “yourlastname-currency-icons.ai” via the relevant assignment page on Blackboard. This time you do not need to submit a JPG and a PDF. Make sure resolution-based images are embedded in Illustrator files.
– – – – –
Part 3: Currency Designs
(100 pts for individual design submission, due 12/3/2019)
For Part 3, each individual member of your group will create currency designs using the set of icons, pattern(s), and colors you agreed on and compiled on 11/19/2019. (Make sure you have shared the relevant files with all group members. The chosen pattern will need to be exported from AI before it can be shared.) Each group member will create his/her own designs for both the back and front of the bill. In addition to the agreed on icons, patterns, and colors, each group member may use additional design elements of his/her choosing. The goal of the bill design is to visually celebrate and explain what the business provides to the Palouse community.
Each member of the group will do this work on his or her own and turn in files via the “Artisanal Currency Part 3: Currency Designs” assignment page on Blackboard. On 12/3/2019 your group will review all designs and choose one to present as your final design choice on 12/5/2019.
Think carefully about how your overall composition can use your design components in visually interesting ways. Think about the contemporary examples you read about in Do You Have Change for a Bowie? The Advent of Artisanal Cash, and the historical currency examples we saw in Manuscripts, Archives, and Special Collections. How will the designs on the two sides of the bill be related to one another, but also unique? Refer back to your readings on “Point, Line, Plane,” “Rhythm & Balance,” and “Hierarchy” as you design the bill as well.
What Text Will be Used on the Designs?
Each group will be assigned a bill denomination and front and back of all bill designs should show denomination as well as text stating “Buy Local Palouse.” In addition, your group may wish to discuss ideas for additional text that would be appropriate for your designs. You may decide to include names of businesses, brief descriptions of businesses and/or quotations from business owners. What other ideas for text-based information might you have? Again, see examples from class readings and field trips.
Design Guidelines:
We will follow some other guidelines as a class in the hopes that the final designs will have some visual similarity and coherence:
- Each bill should be 6.25 x 2.75 inches. You may orient your design vertically or horizontally.
- Each bill should use the font we agreed on in class for the denomination ($1, $5, $20, etc.) and for text that says “Buy Local Palouse”. For the 9:10am section, this font is Baskerville. For the 1:25pm section, this font is Futura.
- Each bill should use the whole set of icons, pattern(s), and colors you agreed on a group, but these may be used at any scale and in any arrangement and repetition
- Additional imagery and text may also be added
- You may use one additional font of your choosing
- Your bill denominations were assigned by group on November 21st. See announcement of Blackboard for more info.
In Illustrator:
- One 6.25 x 2.75 inch artboard for front of bill and one 6.25 x 2.75 inch artboard for back of bill
- Name the file “yourlastname-currency-final.ai” (You will also turn in JPGs and a PDF)
- Make sure to embed resolution-based files if you use them
- Convert all type to outlines
- In addition to turning in the AI file, turn in a PDF: [File > Save As: Choose “Format: Adobe PDF.” Hit “Save.” In the next dialog box choose “Adobe PDF Preset: High Quality Print” and Uncheck “Preserve Illustrator Editing Capabilities”. Hit “Save PDF.”]
- In addition to turning in the AI file, turn in JPG files, one for the front and one for the back of the bill design: Export as high resolution, high quality JPGs. [File > Export > Export As: Choose “Format: JPG,” and have “Use Artboards” checked. Hit “Export.” In the next dialog box choose “Maximum Image Quality” and “Resolution: High (300 ppi)”. Hit “OK.”]
What You Will Upload to Blackboard:
Place all your files in a folder called “yourlastname-currency-final”. This folder will contain your AI, PDF and JPG files. Zip the folder before uploading via the relevant assignment page on Blackboard. The folder must be compressed as a ZIP.
– – – – –
Part 4: Final Presentations
(50 pts for group presentation, due 12/5/2019)
On 12/3/2019 your group will review all designs and choose one to present as your final design choice on 12/5/2019. (Your instructor will have the design printed and ready for 12/5/2019.) Put together a final presentation that covers:
- Overview: What is this business? Why is it unique? What is accomplished or produced?
- What specific task or process did your group document? Show some examples of your documentation.
- How did icons and patterns get drawn from this task or process? Give examples from a few members of your group. Which final set did you choose and why?
- What were your options for the final currency design? Which one did you choose and why? Defend your choice using relevant readings and materials from this project, such as your understanding of “Graphic Design: The New Basics” and our class visit to MASC.
Plan and practice your presentation to be no more than ten minutes long.
What You Will Upload to Blackboard:
Make sure your presentation is ready by the time class starts on 12/5/2019. You may submit via Blackboard as a Powerpoint file or a web link (only one group member needs to submit). If you submit a link, set permissions so you do not have to login to access the presentation. This will save time during class and give your instructor access as well. If you submit a PPTX file, name it “yourbusinessname.PPTX”.
– – – – –
Field Trips
We will visit Manuscripts, Archives, and Special Collections at Holland-Terrell to draw inspiration for this project. They have an interesting collection of historic currency from countries around the world. You are always welcome to return to MASC if you want to study more currency examples.
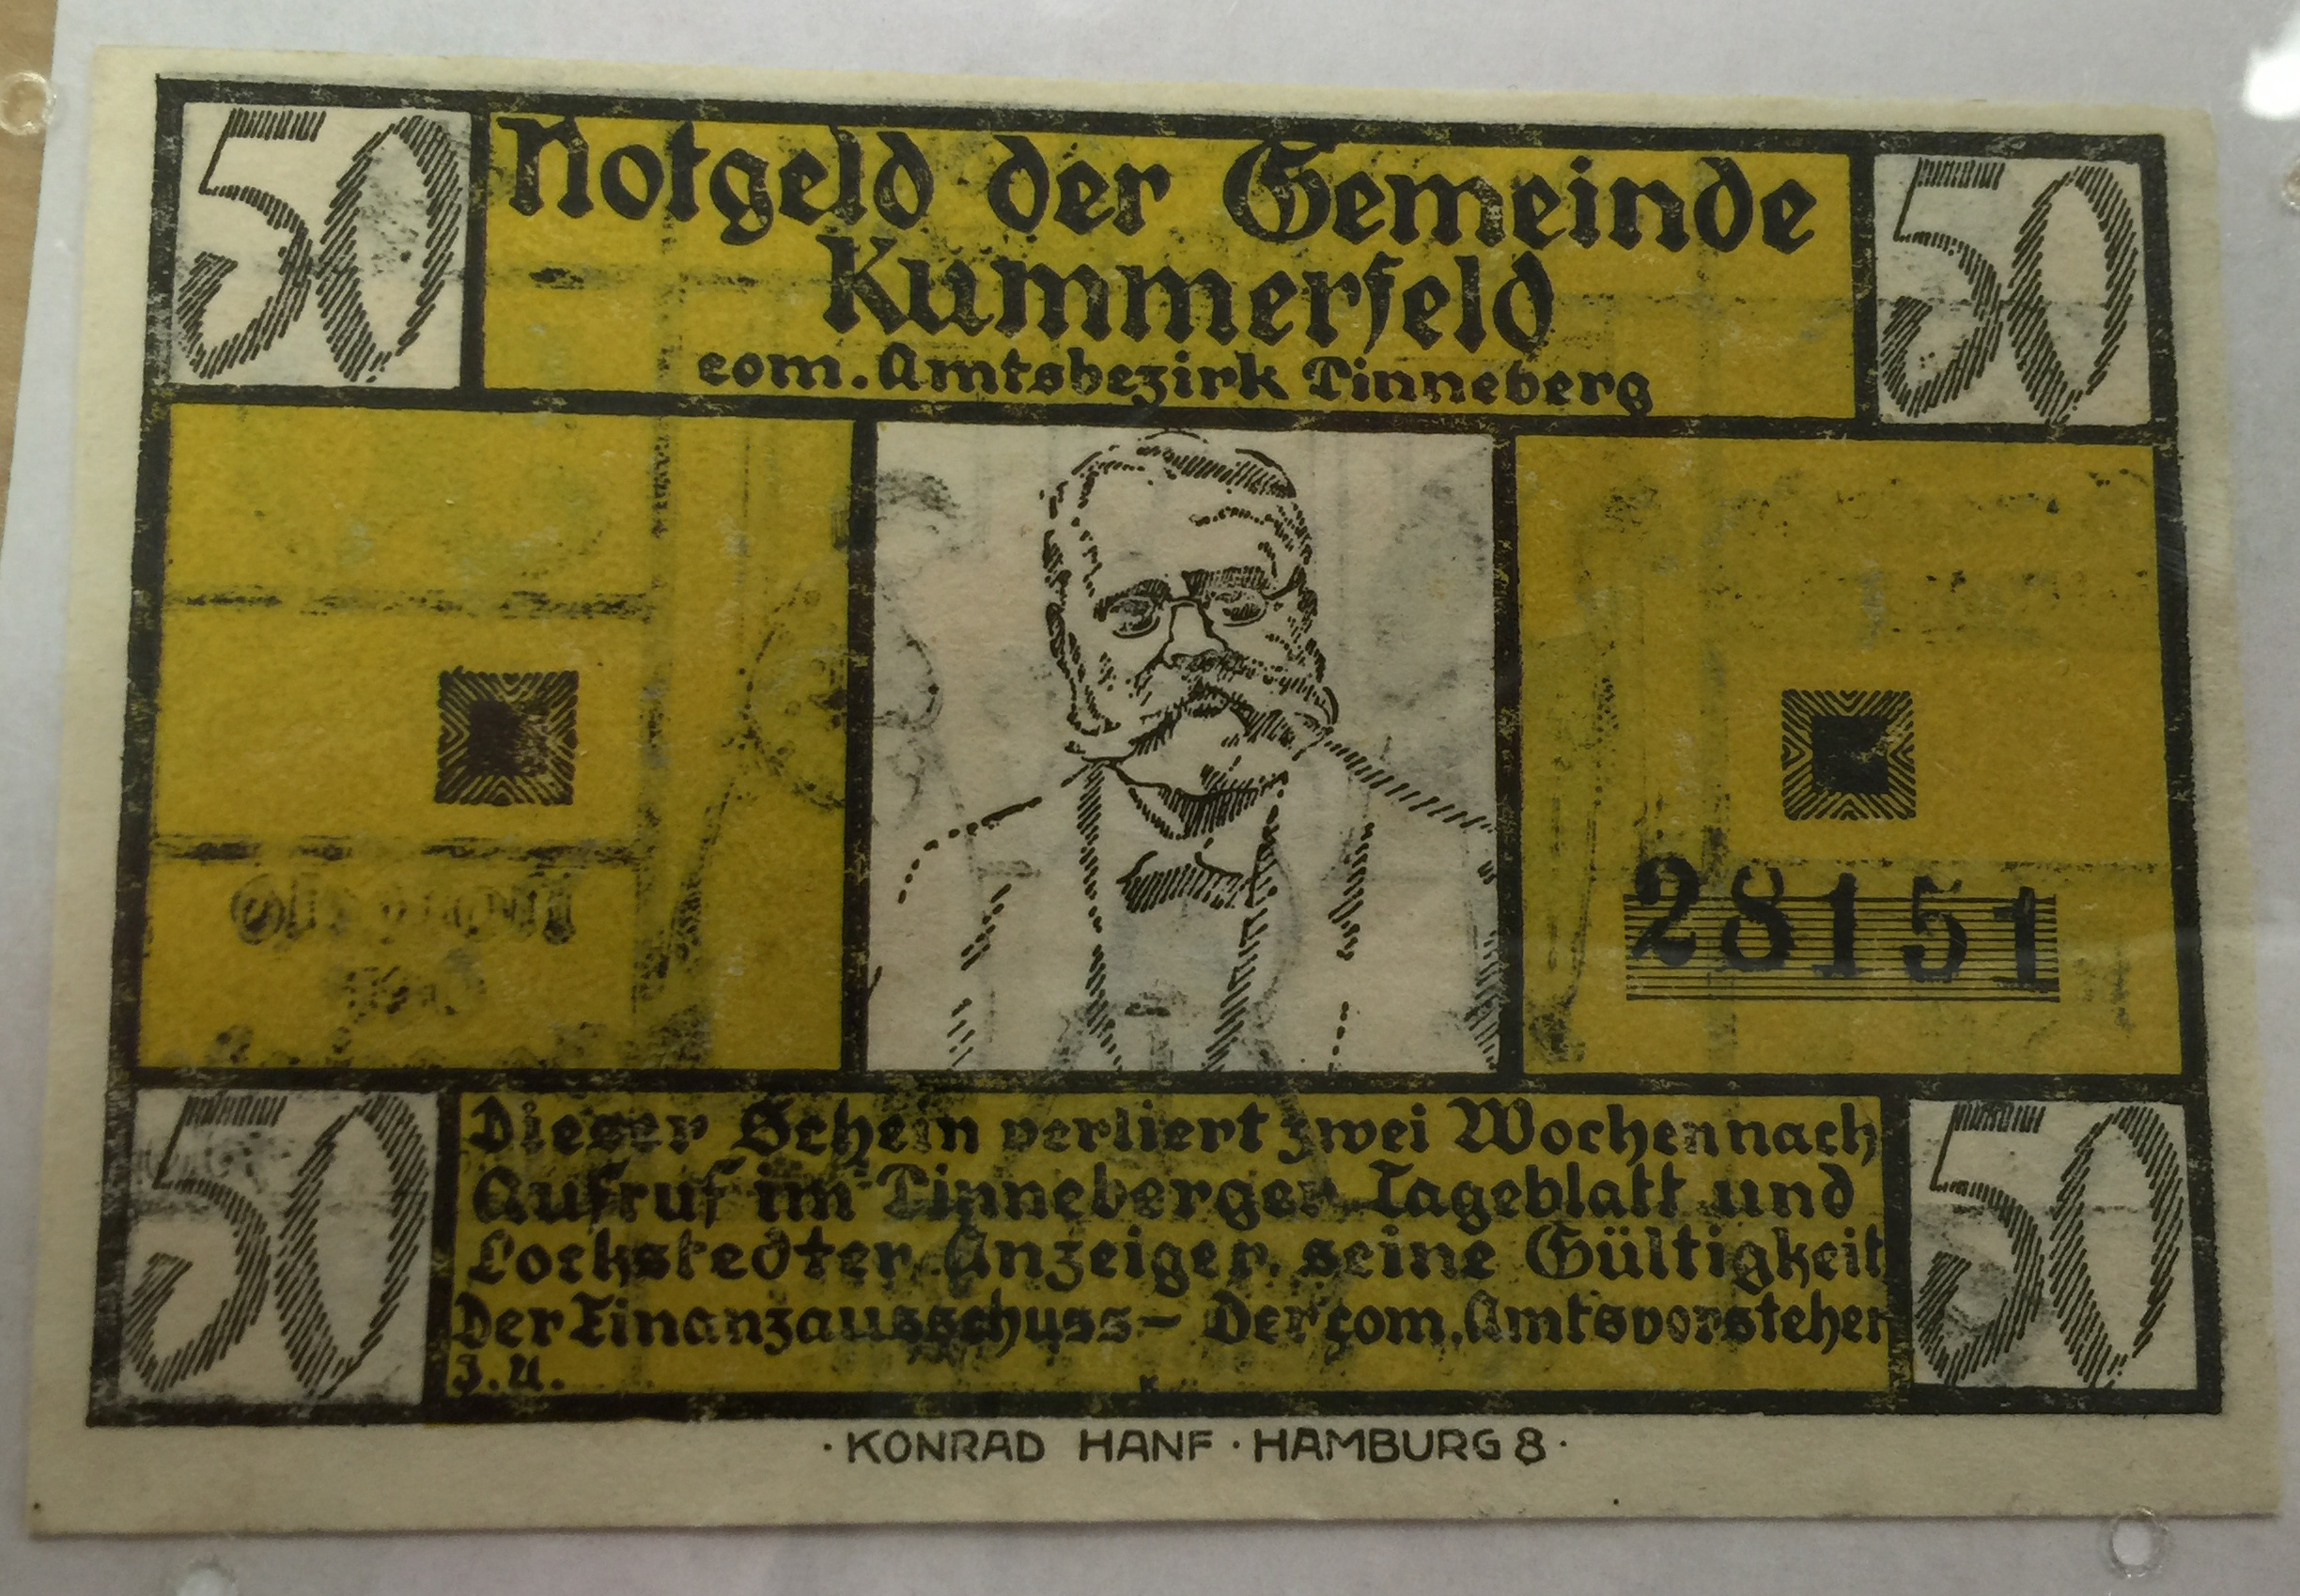
Historic German currency, Donated by Ed Carver, WSU Manuscripts, Archives and Special Collections
